Over the past few months, we have focused on helping IT organizations prepare for rising RAM and NVMe SSD prices and the server shipment delays that follow. During that same period, we released VergeOS 26.1, which raises the bar on data availability and protection capabilities. The connection between these two efforts is not obvious at first. What does data availability have to do with reducing exposure to the memory supercycle? Everything.
Key Takeaways
- SK Hynix projects constrained commodity DRAM supply through at least 2028, making hardware cost avoidance a multi-year strategy
- HCI clusters face cascading failures when a node goes down: VM displacement, storage rebuild contention, and capacity exhaustion can collide in a single event
- Data locality creates a hidden performance cliff that HCI clusters hit at the worst possible time during a node failure
- VergeOS separates compute and storage roles so a node failure only affects one function, not both simultaneously
- VergeOS provides drive wear tracking and configurable warnings so administrators can plan replacements before failures occur
- ioGuardian restores redundancy without replacement hardware, eliminating the race between procurement and the next failure
- VergeOS runs on commodity and refurbished servers of any generation, turning hardware uncertainty into a cost optimization strategy
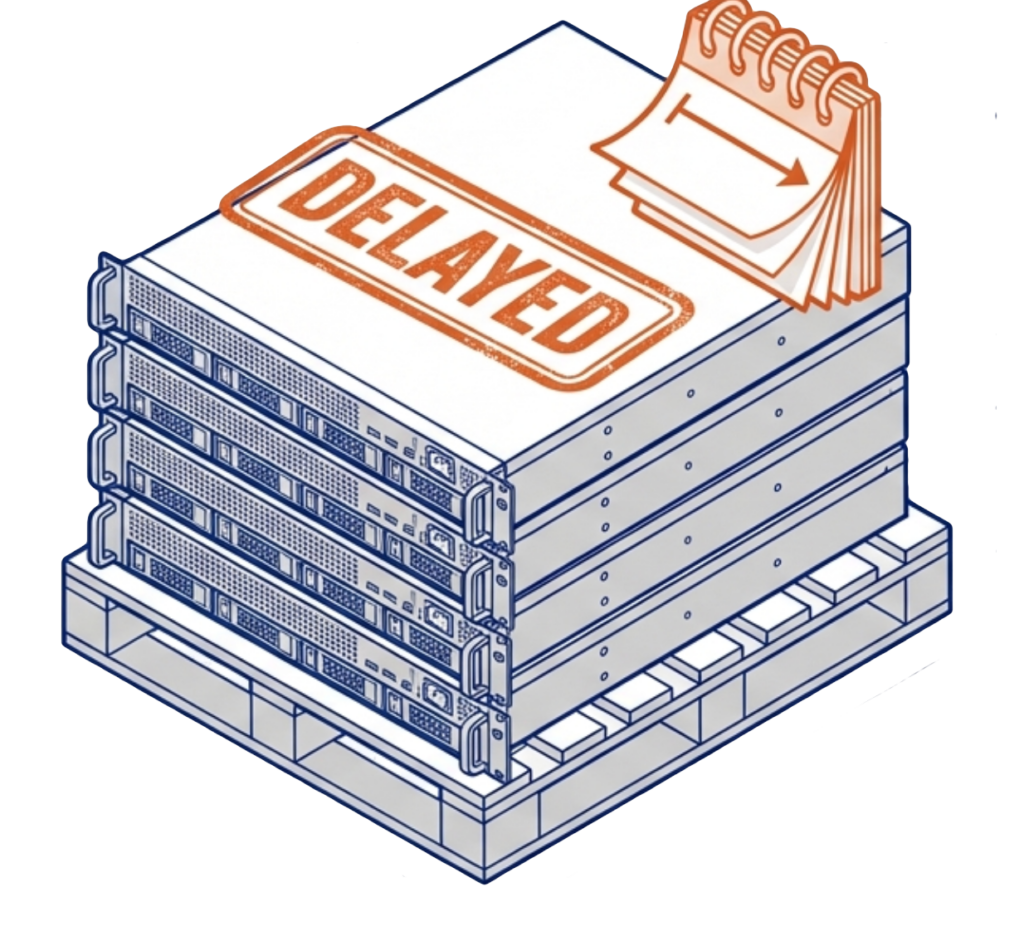
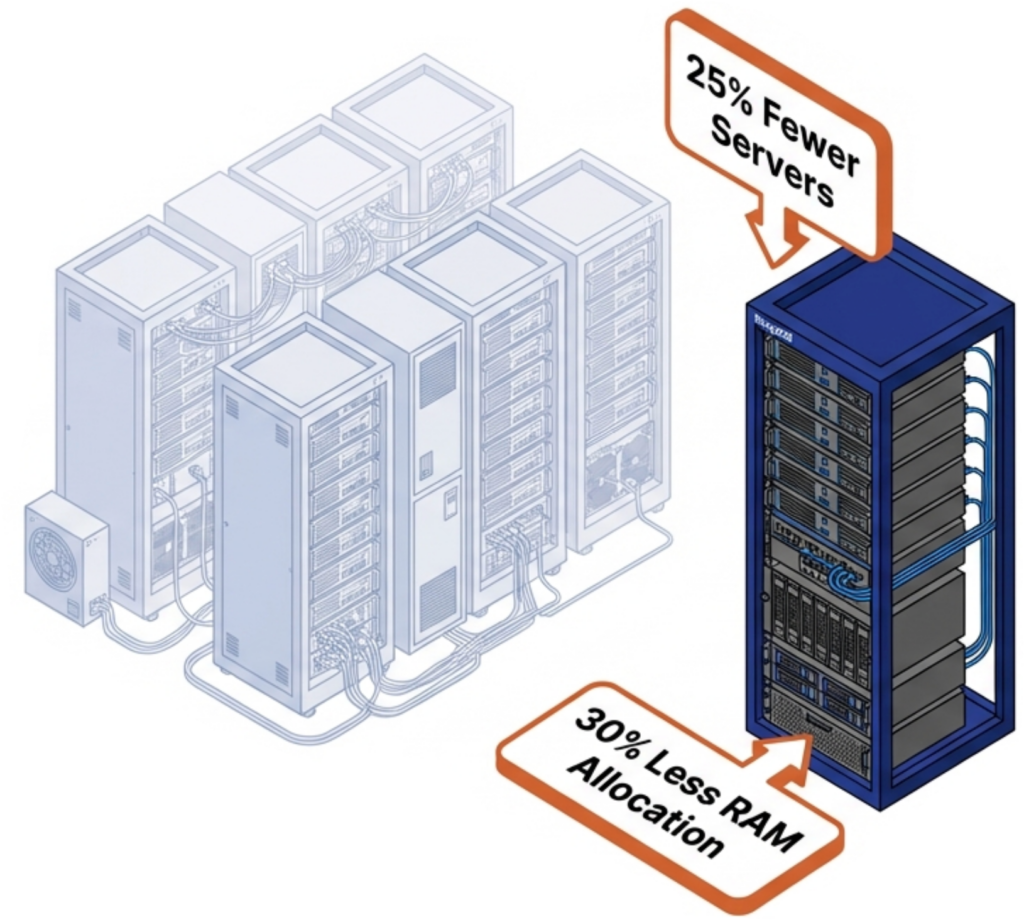
When RAM prices climb 50% or more year over year, and new server deliveries stretch by months, organizations respond by extending the life of existing hardware, consolidating workloads onto fewer servers, and even considering refurbished components for the first time. Each of these strategies increases the risk of hardware failure. Data availability is the layer that determines whether those failures are routine events or business-stopping emergencies.
We covered this topic in depth during our on-demand webinar, Right-Sizing Disaster Recovery with VergeOS 26.1. The session walks through per-resource replication, tag-based partial snapshots, and the protection tier framework that makes these supercycle survival strategies work. This article expands on that discussion.
Key Terms
- Memory Supercycle — A period of sustained RAM and flash price increases driven by AI demand absorbing available supply, constrained manufacturing capacity, and DDR4-to-DDR5 transition dynamics. Expected to last through at least 2028.
- Data Locality — An HCI performance technique that keeps VM data on the same physical node running the VM. Reduces cross-node I/O under normal conditions but creates a performance cliff during node failures.
- Ultraconverged Infrastructure (UCI) — An architecture where compute, storage, networking, and data protection run in a single software platform but nodes can serve different roles. Not all nodes need to provide storage.
- ioOptimize — AI/ML-driven workload monitoring and placement in VergeOS. Detects degrading hardware and migrates VMs proactively before failures occur.
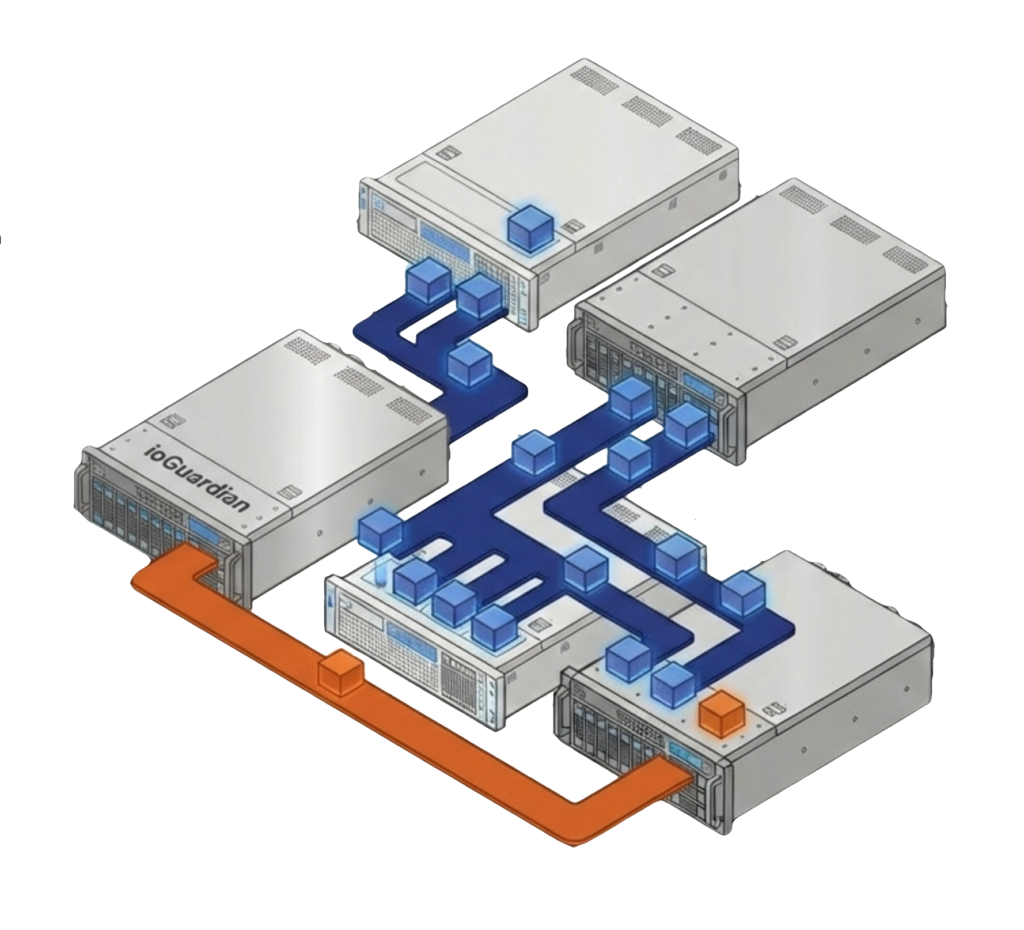
- ioGuardian — Dedicated repair servers in VergeOS that feed missing data blocks back into the production environment after a failure, restoring redundancy without competing for production I/O and without requiring replacement hardware.
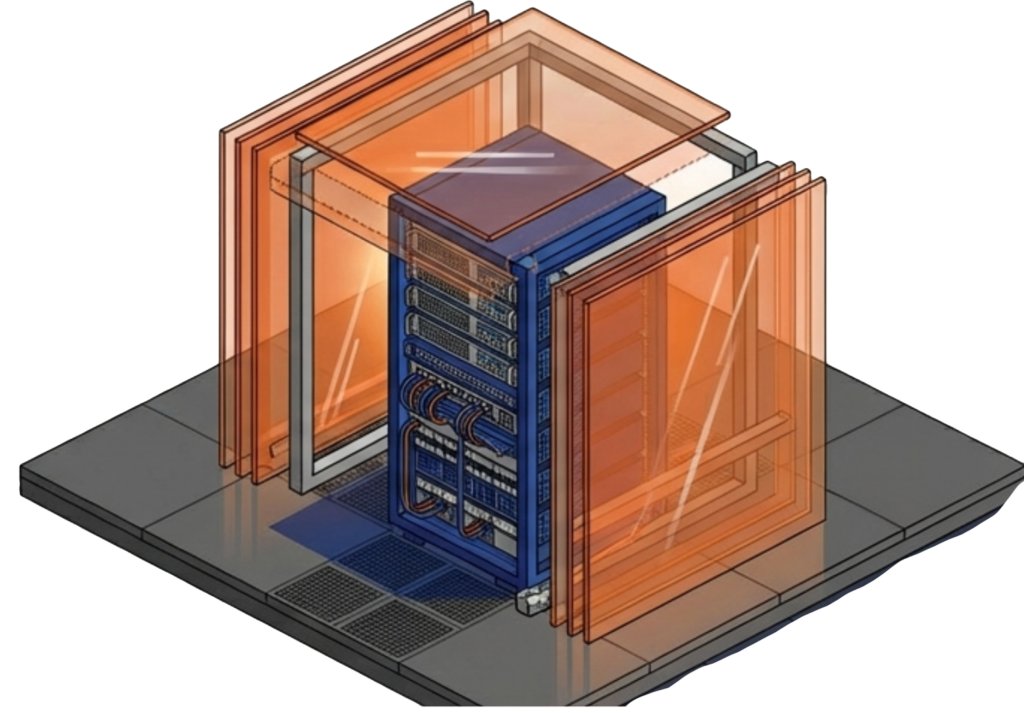
- RF2 / RF3 — Redundancy levels in VergeOS. RF2 uses synchronous two-way mirroring. RF3 uses synchronous three-way mirroring. Combined with ioGuardian, RF2 delivers N+2 and RF3 delivers N+X availability.
- N+X Availability — A protection level where the system can survive an arbitrary number of simultaneous failures beyond the base redundancy level, achieved through the combination of RF3 triple mirroring and ioGuardian repair servers.
The Challenge with Extending Server Life
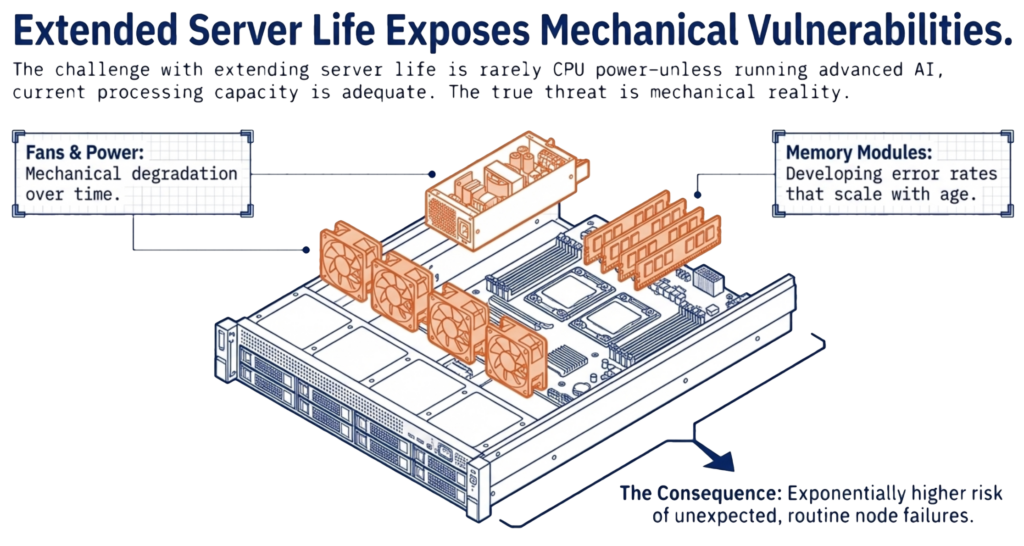
The challenge with extending server life has almost nothing to do with CPU power. Unless you are running advanced AI workloads, the processing capacity in your current servers is more than adequate. The challenge is mechanical reality. Older servers carry a higher risk of failing unexpectedly. Fans wear out, power supplies degrade, and memory modules develop errors that grow more frequent over time.
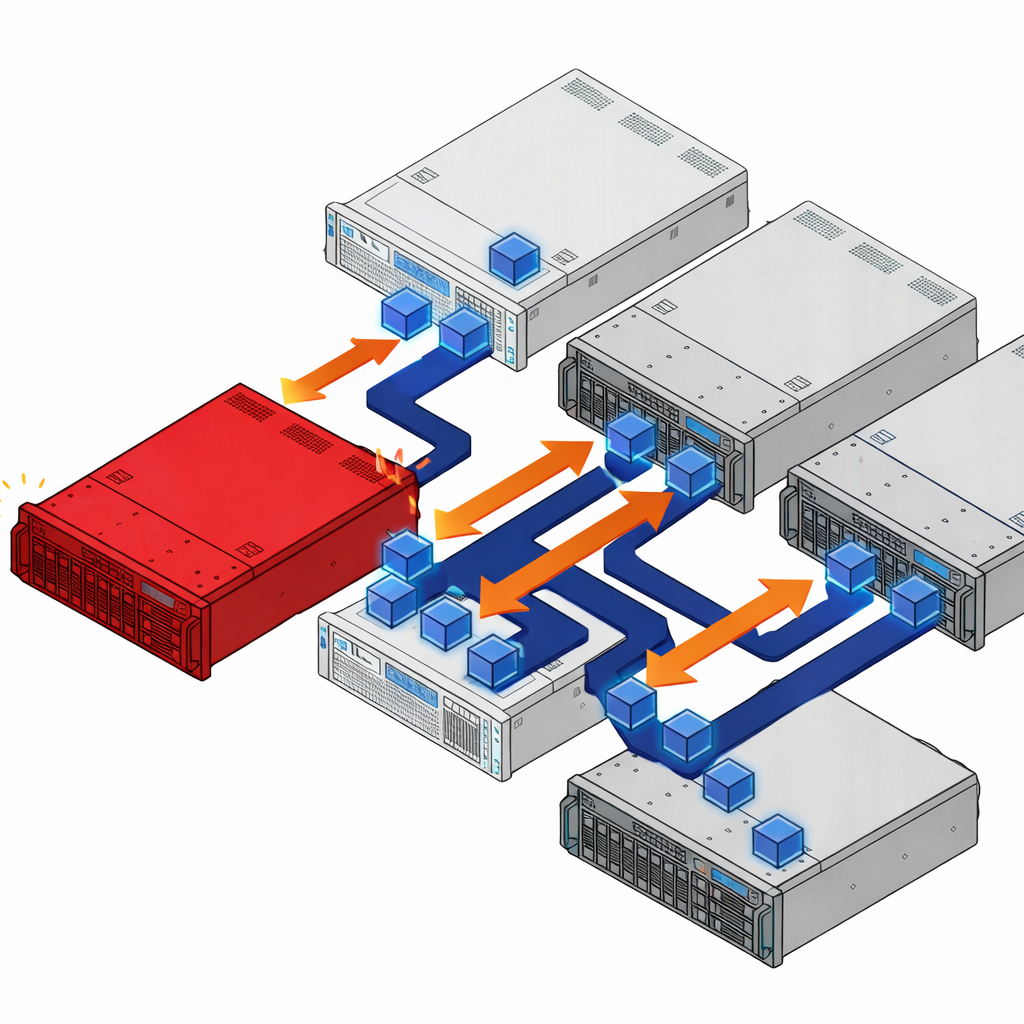
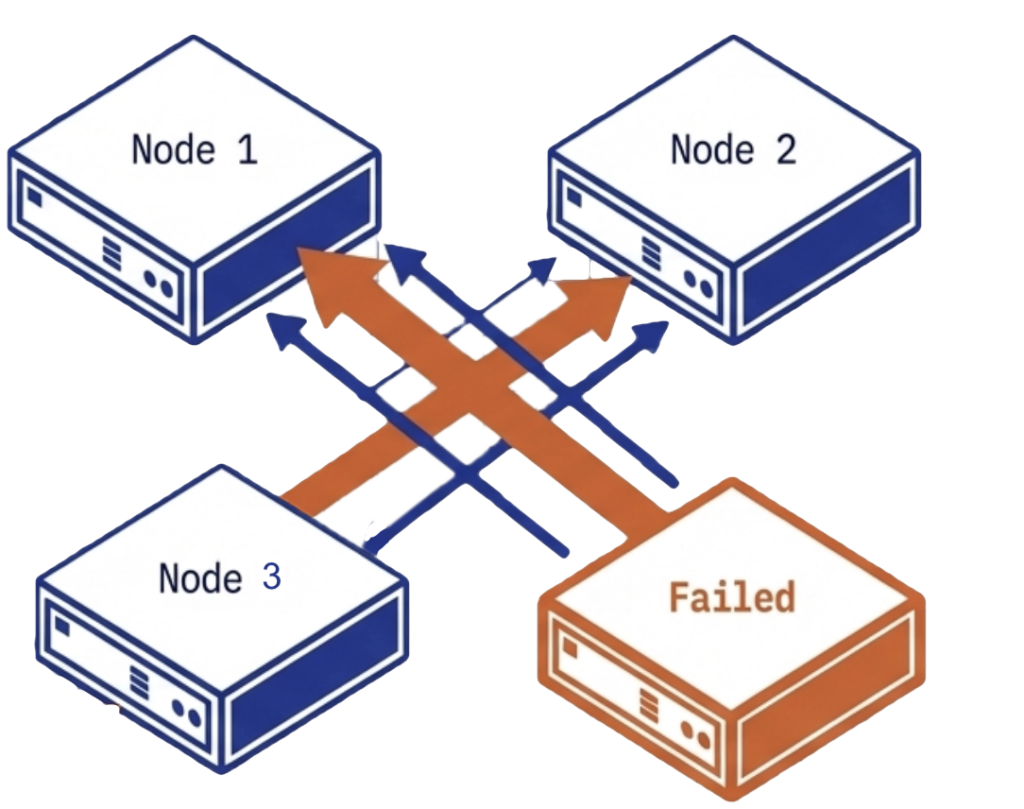
When a server fails in a converged infrastructure, the impact is widespread. Virtual machines must migrate to surviving hosts. In a hyperconverged infrastructure (HCI) cluster, you lose a significant percentage of available capacity in a single event. A four-node HCI cluster that loses one node loses 25% of its capacity. The surviving nodes must absorb displaced VMs on top of their existing workloads while simultaneously rebuilding data from the failed node.
If the surviving nodes do not have sufficient free compute or storage capacity to absorb that 25%, the cluster enters a degraded state in which some VMs cannot restart at all. The remaining VMs compete for scarce CPU, memory, and I/O with the storage rebuild process. In a worst case, the rebuild itself fails because the cluster lacks the free disk space to re-replicate the lost data, leaving the environment running without redundancy until an administrator intervenes with new hardware. During a supercycle, that hardware may not be available for weeks or months, extending the window of exposure from an inconvenience into a sustained risk.
If the HCI cluster relied on data locality to mask performance limitations, the penalty compounds during the failure. Data locality works by keeping VM data on the same node that runs the VM, reducing cross-node I/O. When that node fails, the data must be served from a remote copy on a surviving node, and the performance advantage disappears at the exact moment the cluster is under the most stress. For more on why data locality creates fragility, see Advanced Data Resilience Strategy.
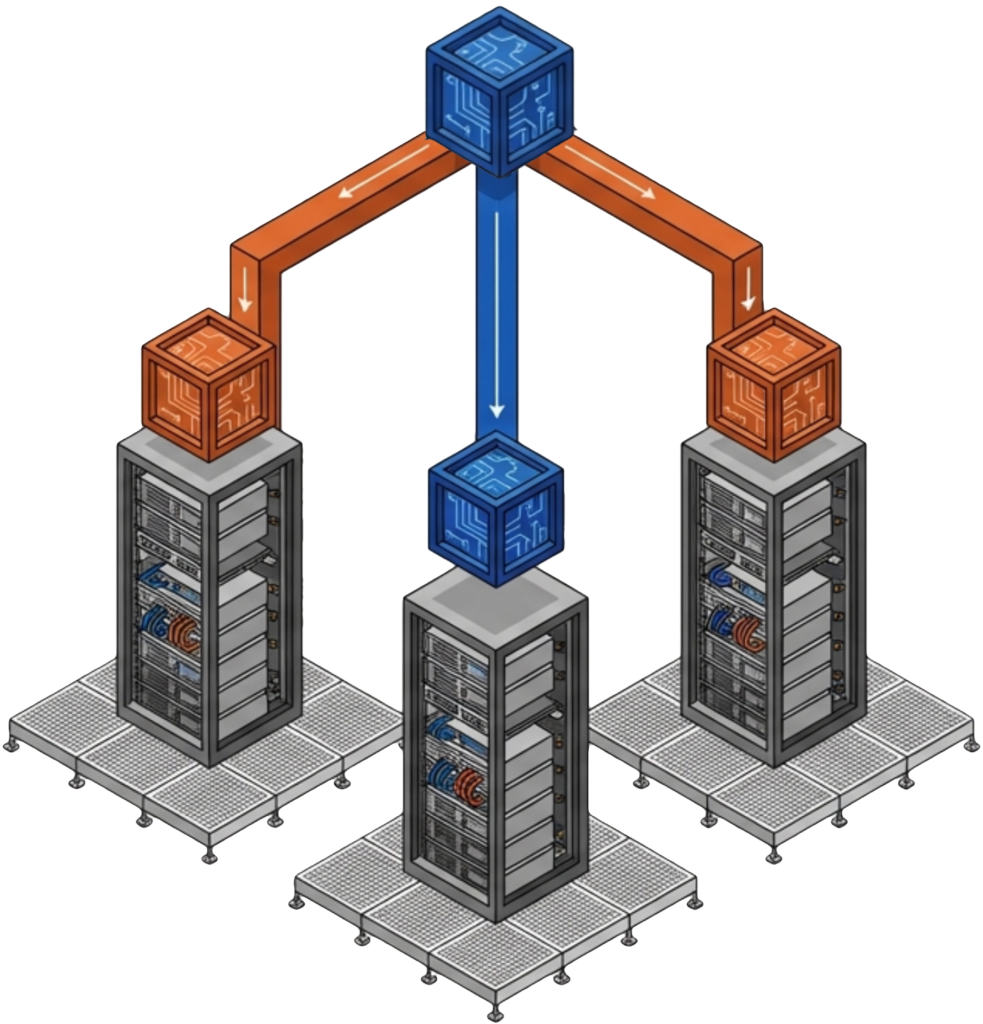
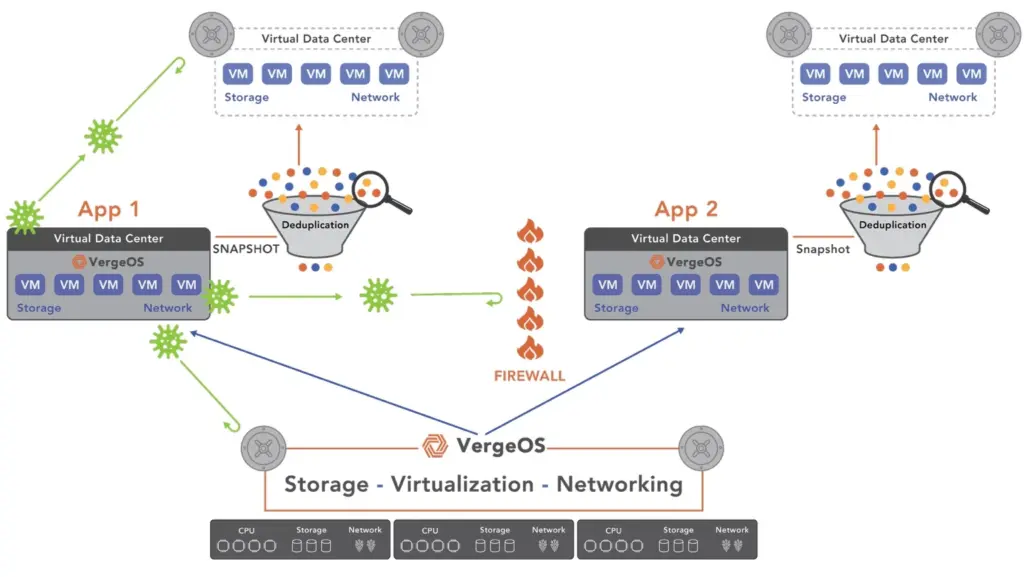
VergeOS addresses this problem architecturally. The platform uses an ultraconverged infrastructure (UCI) architecture in which not all nodes need to provide storage. The failure impact depends on which type of node goes down. If a compute-heavy node fails, ioOptimize intelligently repositions VMs to achieve optimal performance across the remaining hosts, but data access remains unaffected because storage is not tied to the failed node. If a storage-heavy node fails, few VMs need to migrate, and data access reroutes through synchronous mirror copies with no performance degradation. Because VergeOS separates compute and storage roles, a storage node failure does not trigger a mass VM migration, and a compute node failure does not trigger a storage rebuild. This separation means the cluster never faces a cascading scenario in which VM migration, storage rebuild, and capacity exhaustion collide in a single event.
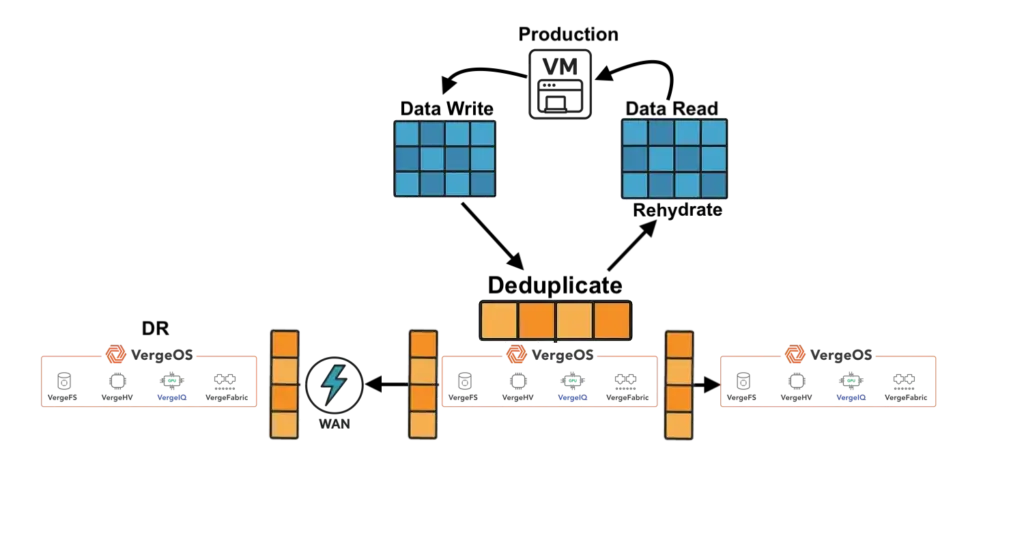
VergeOS does not use data locality at all. Most data traffic travels across the internode network during normal operations, not just during failures. An advanced internode communication protocol, combined with infrastructure-wide deduplication that reduces network traffic by 60-80%, delivers sub-millisecond latency on every cross-node data request. There is no hidden performance cliff when a node goes offline because VergeOS was never relying on local access to begin with. The performance profile during a failure is the same performance profile the cluster runs on every day.
The Challenge with Extending Drive Life
Older flash drives also carry a higher risk of failure, but that failure should not be unexpected. Flash drives track their own wear levels, and the right software gives administrators plenty of warning before a failure is imminent. In that respect, flash is safer than hard disks, which fail without notice. But in both cases, you need redundancy. The question is how much.
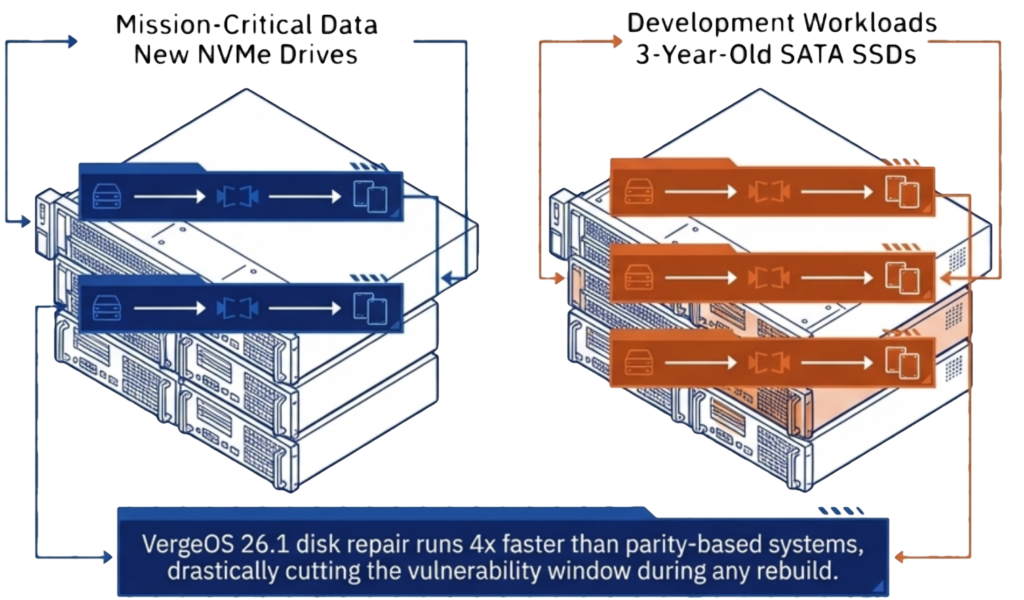
The right level of redundancy should not be based on paranoia. It should match the type of drives in the system, the age of those drives, and the criticality of the data on them. A set of nodes running new NVMe drives supporting Mission-Critical workloads has a different risk profile than a set of nodes running three-year-old SATA SSDs with test and development workloads. Applying the same redundancy to both, wastes money on one and under protects the other.
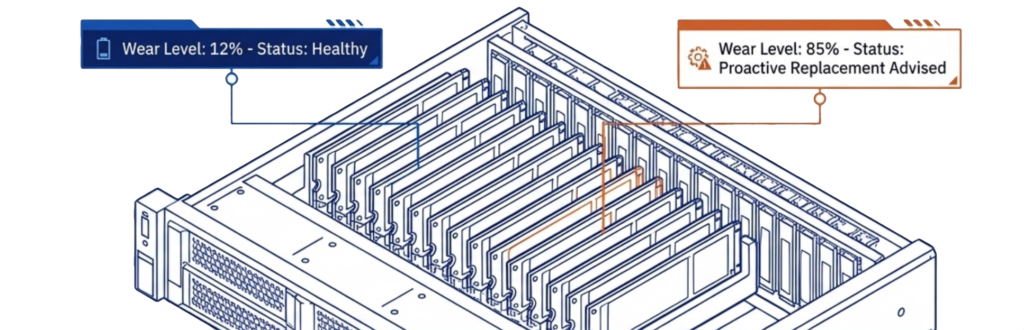
VergeOS gives organizations the tools to make that distinction. The platform provides detailed status reporting on each drive’s remaining useful life, including wear level tracking and configurable warnings when a drive reaches a defined threshold. Administrators see degradation trends before they become failures, giving them time to plan replacements on their schedule rather than react to an emergency.
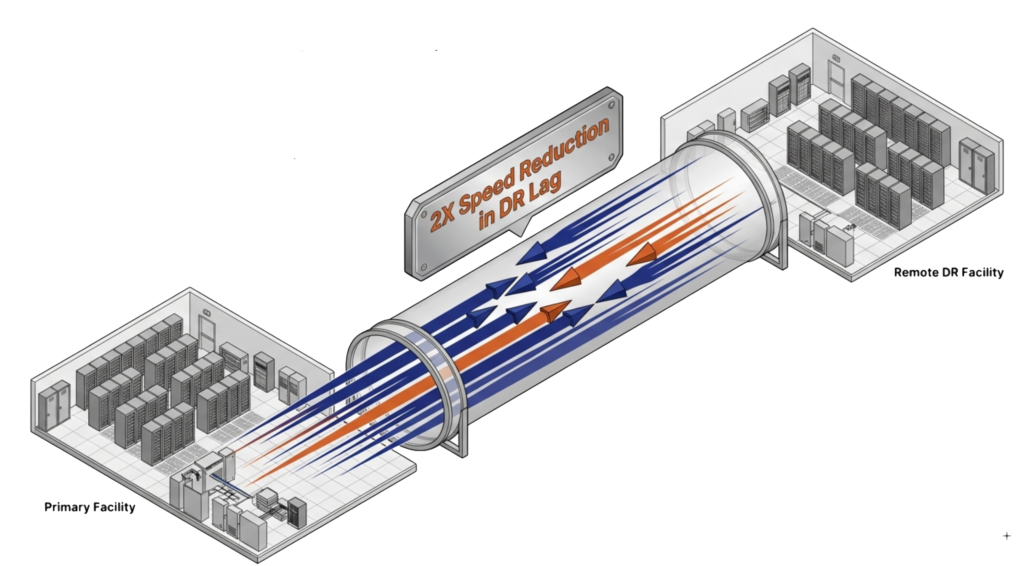
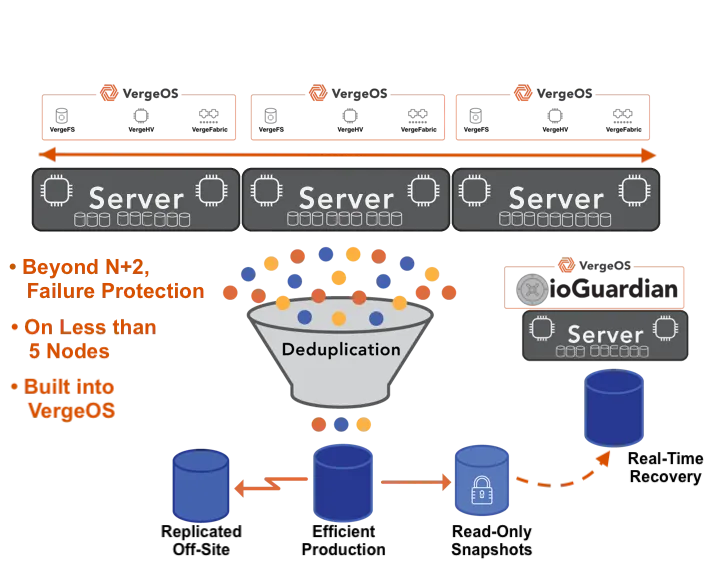
RF2 mirrored redundancy, combined with ioGuardian, delivers N+2 data availability for most enterprise workloads. For organizations running aging drives or protecting mission-critical data, RF3 triple mirroring with ioGuardian, delivers N+X availability. Both options use synchronous mirroring that rebuilds from intact copies, and with VergeOS 26.1, disk repair runs 4x faster than the previous release, cutting the vulnerability window to a fraction of what parity-based systems require.
ioGuardian: Buying Time When Replacements Are Not Available
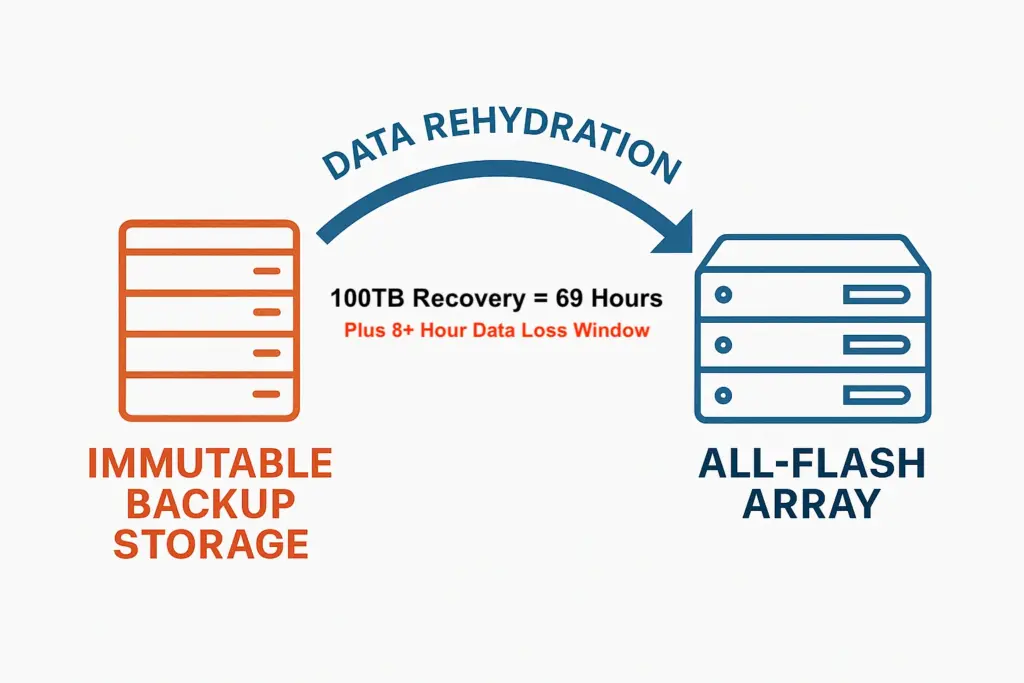
Traditional storage architectures treat a drive or node failure as a problem that demands immediate replacement. The cluster runs in a degraded state until new hardware arrives, gets installed, and completes a full rebuild. In a normal supply chain, that window is hours to days. During the supercycle, it could be weeks or months.
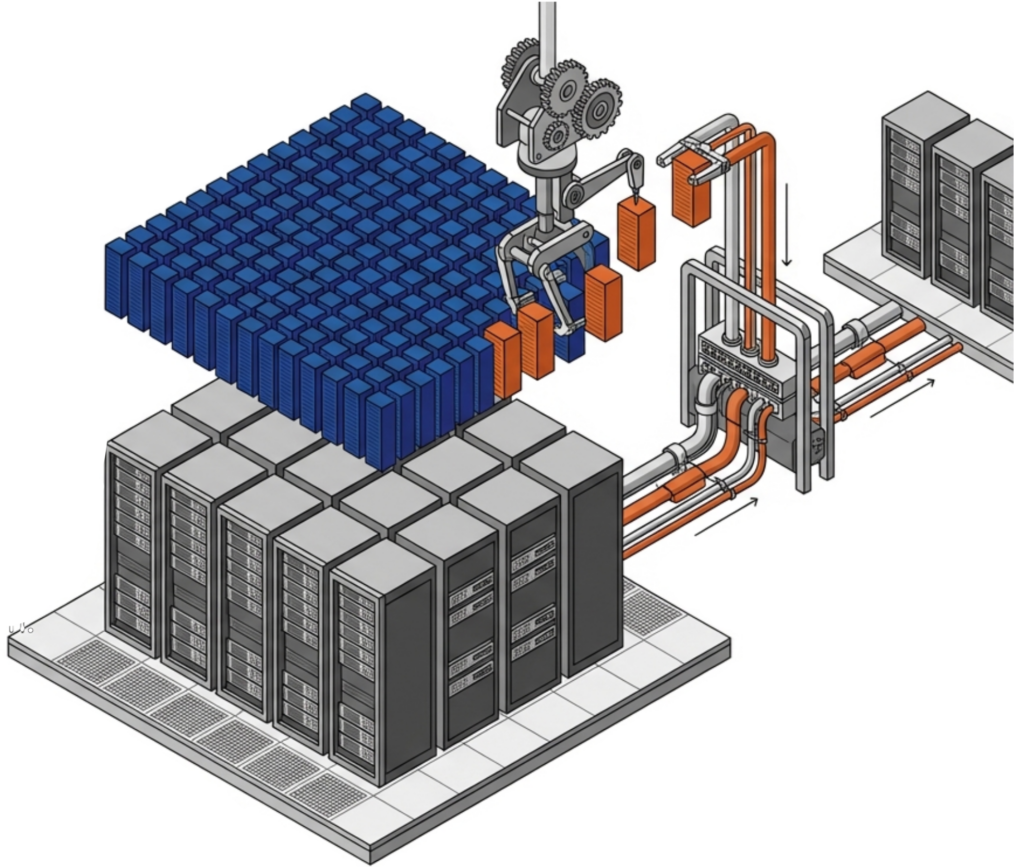
ioGuardian changes that equation. Instead of waiting for replacement hardware to restore redundancy, ioGuardian uses dedicated repair servers to feed missing data blocks, back into the production environment. These repair servers operate outside the production I/O path, so the rebuild does not compete with live workloads for CPU, memory, or disk bandwidth. The cluster returns to full redundancy without new hardware.
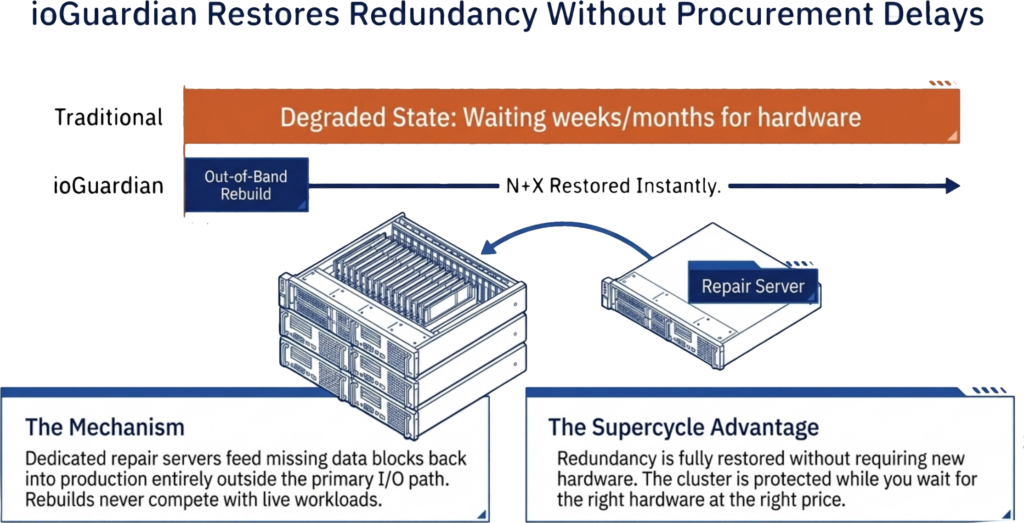
This matters during a supercycle for two reasons. First, it eliminates the urgency to source replacement drives or servers from a market where prices are inflated and lead times are unpredictable. The cluster is protected while you wait for the right hardware at the right price, instead of paying a premium for overnight delivery. Second, it removes the window of exposure that grows more dangerous the longer it lasts. Every day a traditional cluster runs degraded is a day where a second failure could cause data loss. ioGuardian closes that window regardless of how long the procurement process takes.
Combined with RF2, ioGuardian delivers N+2 data availability. Combined with RF3 in VergeOS 26.1, it delivers N+X. In both configurations, the protection holds whether the replacement hardware arrives tomorrow or next quarter.
The Challenge with Refurbished Hardware
The supercycle is forcing a conversation that most IT organizations never expected to have: should we buy refurbished servers, memory, and flash? The economics make sense. Refurbished DDR4 memory costs a fraction of new DDR5. Used servers with adequate CPU power are available when new orders face months of lead time. But refurbished hardware introduces uncertainty about remaining useful life, and that uncertainty demands a protection architecture that accounts for higher failure rates.
VergeOS is built for mixed and aging hardware, as well as new hardware. The platform runs on commodity servers of any generation, mixes server types within the same system, and does not require vendor-matched hardware configurations. This flexibility means organizations can deploy refurbished hardware where it makes financial sense without redesigning their infrastructure. Combined with ioOptimize, which monitors hardware health and proactively migrates workloads off degrading nodes before they crash, refurbished hardware becomes a cost-optimization strategy rather than a gamble.
The Bottom Line
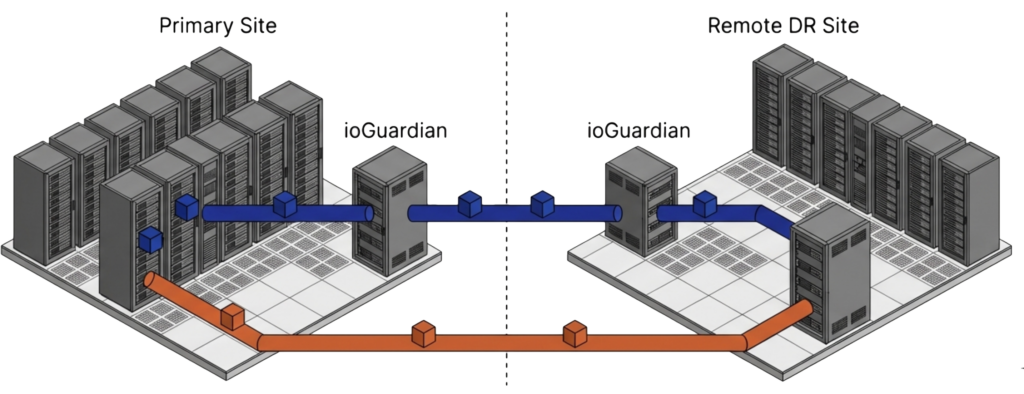
The memory supercycle is not temporary. SK Hynix projects constrained commodity DRAM supply through at least 2028. Organizations that extend server life, stretch drive replacements, and consider refurbished hardware need a platform that treats data availability as a core function, not a third-party add-on. VergeOS delivers layered data availability from the drive level, through the node level, to cross-site replication, all integrated into a single platform that runs on the hardware you already own or the refurbished hardware the supercycle is pushing you toward.
Watch the full session: Right-Sizing Disaster Recovery with VergeOS 26.1
Frequently Asked Questions
- Why does the memory supercycle make data availability more important? Rising RAM and flash prices force organizations to extend server life, delay drive replacements, and consider refurbished hardware. Each of these strategies increases the probability of hardware failure. Data availability determines whether those failures are routine events that the platform handles automatically or emergencies that require immediate intervention with hardware that may not be available.
- What happens when an HCI node fails and the surviving nodes lack capacity? The cluster enters a degraded state. Some VMs cannot restart because there is not enough free compute or memory. The remaining VMs compete with the storage rebuild process for CPU, memory, and I/O. If free disk space is insufficient, the rebuild itself can fail, leaving the environment without redundancy until new hardware arrives.
- Why does data locality create problems during failures? Data locality keeps VM data on the same node that runs the VM to reduce cross-node I/O. When that node fails, data must be served from a remote copy on a surviving node. The performance advantage disappears at the exact moment the cluster is under the most stress, compounding the impact of the failure.
- How does VergeOS avoid the data locality problem? VergeOS does not use data locality. All data traffic travels across the internode network during normal operations using an advanced communication protocol. Combined with infrastructure-wide deduplication that reduces network traffic by 60-80%, VergeOS delivers sub-millisecond cross-node latency at all times. The performance profile during a failure matches normal operations.
- How does ioGuardian help during supply chain shortages? ioGuardian uses dedicated repair servers to restore redundancy after a failure without requiring replacement hardware. The cluster returns to full protection while you wait for the right hardware at the right price. This eliminates the race between procurement lead times and the risk of a second failure.
- Can VergeOS run on refurbished or mixed-generation hardware? Yes. VergeOS runs on commodity servers of any generation and mixes server types within the same cluster. It does not require vendor-matched hardware configurations. Combined with ioOptimize, which monitors hardware health and migrates workloads off degrading nodes proactively, refurbished hardware becomes a cost optimization strategy with built-in protection against higher failure rates.
- What is the difference between RF2 + ioGuardian and RF3 + ioGuardian? RF2 uses synchronous two-way mirroring. Combined with ioGuardian, it delivers N+2 data availability, which meets the requirements of most enterprise environments. RF3 uses synchronous three-way mirroring. Combined with ioGuardian in VergeOS 26.1, it delivers N+X availability for organizations with the most demanding uptime requirements.
- How long will the memory supercycle last? SK Hynix projects constrained commodity DRAM supply through at least 2028. AI demand continues to absorb available memory supply, DDR4 production is winding down, and DDR5 pricing reflects AI-driven demand premiums. Organizations should plan for elevated pricing and extended delivery times for at least the next two to three years.
Rising RAM and flash prices force organizations to extend server life, delay drive replacements, and consider refurbished hardware. Each of these strategies increases the probability of hardware failure. Data availability determines whether those failures are routine events that the platform handles automatically or emergencies that require immediate intervention with hardware that may not even be available.
The cluster enters a degraded state. Some VMs cannot restart because there is not enough free compute or memory. The remaining VMs compete with the storage rebuild process for CPU, memory, and I/O. If free disk space is insufficient, the rebuild itself can fail, leaving the environment without redundancy until new hardware arrives.
Data locality keeps VM data on the same node that runs the VM to reduce cross-node I/O. When that node fails, data must be served from a remote copy on a surviving node. The performance advantage disappears at the exact moment the cluster is under the most stress, compounding the impact of the failure.
VergeOS does not use data locality. All data traffic travels across the internode network during normal operations using an advanced communication protocol. Combined with infrastructure-wide deduplication that reduces network traffic by 60-80%, VergeOS delivers sub-millisecond cross-node latency at all times. The performance profile during a failure matches normal operations.
ioGuardian uses dedicated repair servers to restore redundancy after a failure without requiring replacement hardware. The cluster returns to full protection while you wait for the right hardware at the right price. This eliminates the race between procurement lead times and the risk of a second failure.
Yes. VergeOS runs on commodity servers of any generation and mixes server types within the same cluster. It does not require vendor-matched hardware configurations. Combined with ioOptimize, which monitors hardware health and migrates workloads off degrading nodes proactively, refurbished hardware becomes a cost optimization strategy with built-in protection against higher failure rates.
RF2 uses synchronous two-way mirroring. Combined with ioGuardian, it delivers N+2 data availability, which meets the requirements of most enterprise environments. RF3 uses synchronous three-way mirroring. Combined with ioGuardian in VergeOS 26.1, it delivers N+X availability for organizations with the most demanding uptime requirements.
SK Hynix projects constrained commodity DRAM supply through at least 2028. AI demand continues to absorb available memory supply, DDR4 production is winding down, and DDR5 pricing reflects AI-driven demand premiums. Organizations should plan for elevated pricing and extended delivery times for at least the next two to three years.